
Vanity Fair
Today’s entry is not about a particular pedal. Actually not even about electronics. Today I would like to share some thoughts about decorating your pedals. At the beginning I did not decorate my pedals at all. I just boxed them into a plain alu enclosure and done. Sometimes I didn’t even put a knob on the pots: in the end you would set them by ear and not by eye :) But still I had this feeling in the background that if I take a lot of effort to design and build my pedals then they could also look somewhat better. Of course at the beginning I changed the effects in my board from month to month, so it would not have had much sense to pay a lot for decorating them. And yes “to pay a lot” quite literally: the most expensive part of building pedals is decorating them – except if you have the tools and knowledge to do this all at home too. But even then it is the most labour intensive part. I have read the following on a forum (I can’t find it anymore, so it is not a precise quotation): “Building pedals is just like the opposite of sex: all the fun happens before you get into the box.” And that is quite true: I like designing and building the electronics much more than boxing the effect and decorating the enclosure. But I think I’m not the only one feeling this way. Still it is a nice feeling when you put the knobs on your finished effect that resides in a nice box (usually that is the last step for me). So let’s have a look what techniques there are to decorate your pedal. The list below is just an overview of the possibilities and some of them I haven’t ever tried. It is just a summary of the techniques known to me.

Hand painting
I have never tried this knowing my artistic shortcomings. From the builders I know and admire the best such effects are made by Jon Patton. There are probably many other builders hand painting their effects, but for some reason I like Jon’s work especially. Maybe because of his contribution to the DIY world too…
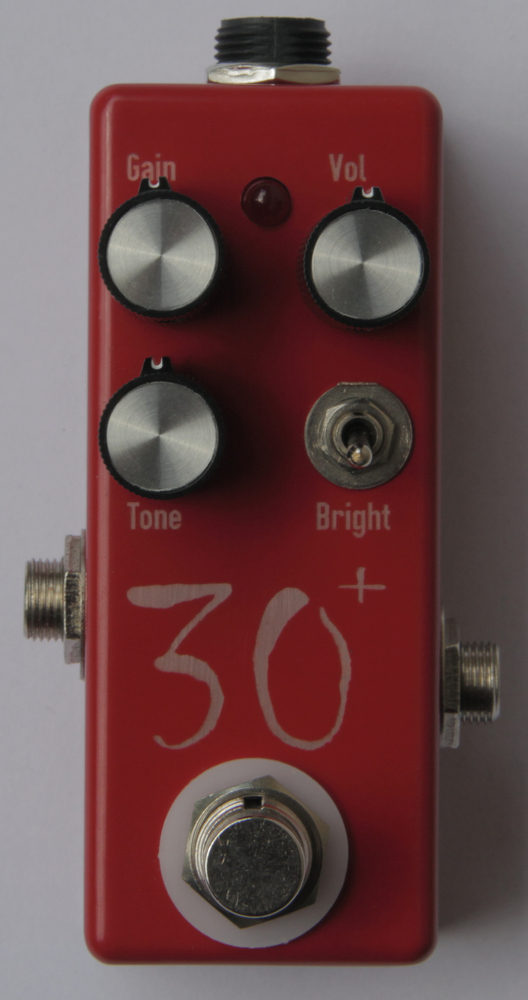
Basic colors
You can achieve basic colors by powder coating or by using thinner based paints. I’m a fan of powder coating, because it is more durable and eco-friendlier. Powder coating is not simple at home: you need a special spray gun and a suitable oven. There are however quite a few companies that will do powder coating for you, I usually use these. At home it is much more simple to use the traditional thinner based paints. The best results can be achieved with the good old rattle can paints. You need however a place with good ventillation. And not your living room please… Painting enclosures has a quite strong smell effect :) And the place in use should also be as dust free as possible. Those pesky little dust particles just love to stick to the drying paint. Painting itself is quite simple: sanding, primer coating, painting. Some of the paints don’t even require a primer coat. And some can be baked out too to make the paint even more durable. But don’t use the oven in your kitchen, rather buy a cheap electric grill oven. Exact recipees and descriptions can be found all over the net, unfortunately I’m not the best source here as I have never tried painting my enclosures myself due to the lack of a proper place. Also the aboslutley lazy can buy powder coated enclosures in all colors, sizes and shapes. They’re just quite expensive compared to the DIY methods.
Electrolytic techniques
Aluminium can be plated by other metals, such as chrome. There are a few companies that can help you with this. Another electrolytic technique is to anodise the alu enclosures. This can be done at home, but since quite aggressive chemicals are involved too a proper workshop or at least a garage is required. During the process the surface of the alu enclosure is oxidized and the porous oxyde layer is coloured. Exact descriptions can be found on the net, I have not tried this in the lack of a proper place. There are also companies out there that can help you with anodising too, however some experimentation may be required as the enclosures are not pure aluminium, but alloys.
Decals
 You can put decals even on plain alu enclosures and they look good on basic colors too. You can use self adhesive or water decals. Both of them are available for laser and inkjet printers as well. I have tried a few of these and I have to say one needs to be patient till the suitable decal for your printer is found. It is also important that for dark basic colors you need white decals. Even so the design will get a bit darker unfortunately. Water decals used with inkjet printers need to be coated before applying otherwise water will not only solve the decal from the paper, but also the ink from the decal :)
 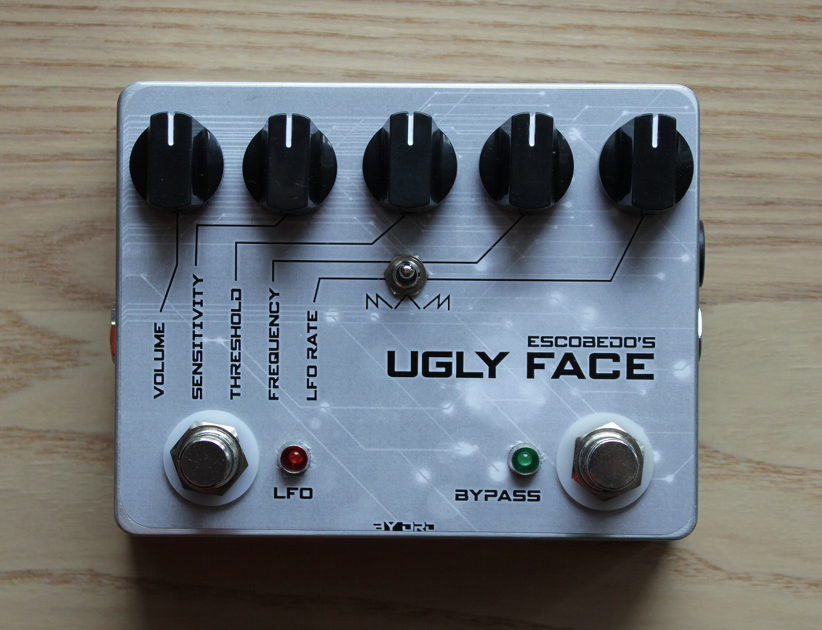 Waterdecals in general need to be coated after application too because they are less durable than the self adhesive ones. I
usually coat the self adhesive ones too before applying them. Using decals is a technique widely used, because it is quite a simple and effective way to add multi colored patterns to your pedal. Also it is quite cheap. I don’t like to use it however because it involves coating at least the decal and without a proper workshop it is not simple.
 Laser engraving
This technique works for me the best. The pa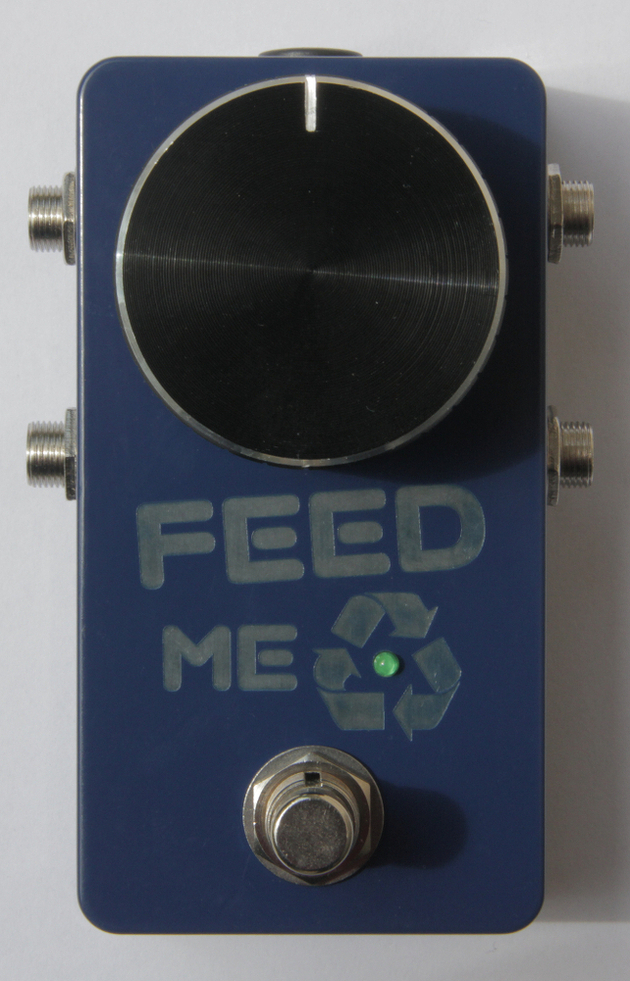 int layer is burnt down to the aluminium surface by a laser beam. The laser is controlled by computer to burn the pattern you define in the paint layer. If you have a dark painted enclosure, then before painting it you may want to sand the oxyde layer to have a better contrast with the paint. If however you have a lighter color, then leave the orignal oxidised surface. Of course this technique has its limits too: only monochrome patterns can be applied and you are limited by the basic color of the alu enclosure. The paint needs to be different enough to have the contrast. On the other hand you don’t need to use smelly or dangerous chemicals at home, everything can be “outsourced” :) I’m also thinking about extending this technique a bit. Powder coating makes a quite thick paint layer and by laser engraving it you get some recess that can be filled up with some modell paint that is thinned to the right viscosity. I have not tried this so far, but it would make the technique a bit more versatile.
Laser foil
Some laser engraving companies carry the so called laser foil too. This is a two-layer plastic sheet where the upper layer is removed by laser revealing the bottom layer. The foil can then be glued onto the box (the thinnest version I know is about .6mm thin and that is even self adhesive). The color selection is defined by the types your laser engraving company carries. You are still bound to use monochrome patterns though (but the above mentioned method to fill the recessed area with paint would work here too).
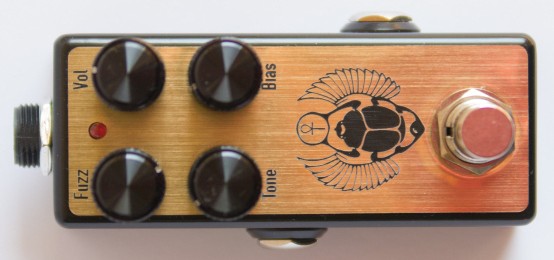
Etching
It is a widely used method to decorate your plain alu enclosure. The technique is similar to how the PCBs are etched: you need to apply a mask to cover the areas you don’t want to etch and use some etchant on the rest. Once done the mask needs to be removed either by a solvent or mechanically by sanding. Some people then paint the enclosure and sand back the paint so that it stays only in the etched areas. Very good industrial effects can be achieved, but with some practice, good masking and good etchant quite detailed patterns can be applied too. You can find the exact descriptions on the net together with what masking method and what etchant to use. Good news is that if you are able to etch your own PCBs, then you can do this at home too.
Special technique is the electrolytic etching. It is similar to anodising, but only the unmasked part will be anodised. The hard part here is to remove the mask, because sanding would also remove the anodised pattern. Also the possible colors are real limited: base is the sanded/polished alu and the pattern is black.
Screen printing, pad printing
Theoretically this would be a method too to decorate your enclosure. In practice it is very expensive, because producing the necessary tools (screen) is expensive and only makes sense if you are putting the same pattern on a larger amount of objects. However this is the most professional way, large companies (such as Boss, Ibanez, etc.) use this.
More or less these are the methods and techniques I know, some of them I have even tried. But you don’t need to restrict yourself to these only. I have seen once a pedal that was powder coated and then decorated with washers and nuts and looked really cool. So you can let your imagination fly freely :) To me the best practice is to powder coat my pedals and then either use laser engraving or laser foils. But of course everybody needs to find the solution that suits his/her needs/money/time/possibilities. As usual I’d love to see your comments and inputs on this topic.
No Comments